I needed to connect a Postgres database living in a Heroku Private space to Looker, a data intelligence and vizualization tool. This is how I did it.
A few months ago, Heroku enabled AWS PrivateLink integration, to allow users to connect Postgres databases in Private spaces to Amazon VPC.
Heroku has a handy tutorial on how to go about doing that. This post is largely based off that, but with a few improvements based on my experience executing those steps, and additionally setting up an EC2 as a TCP proxy for Looker to talk to.
To start with, I’m assuming you already have:
- A Heroku Postgres database in a Private space
- The Heroku CLI
- The AWS CLI (optional)
- Your AWS account ID (you can find it under
Security Credentials) - An existing AWS VPC
For the purposes of this walkthrough, the name of the Heroku app will be
heroku-app, the name of the attached Postgres database will be
heroku-postgres, the AWS account ID will be aws1234.
Also, do note that the Heroku Postgres database lives in the same region as the VPC and the EC2 instance. Multi-region deployments are out of the scope of this walkthrough.
#1. Install the PrivateLink CLI plugin.
heroku plugins:install data-privatelink#2. Create a PrivateLink endpoint.
heroku data:privatelink:create heroku-postgres \
  --aws-account-id aws1234
  --app heroku-app
This may take up to 10 minutes.
#3. Obtain the endpoint’s service name.
heroku data:privatelink heroku-postgres \
  --app heroku-app
=== privatelink endpoint status for heroku-postgres
Service Name: com.amazonaws.vpce.us-east-2.vpce-svc-123456
Status: Operational
=== Whitelisted Accounts
ARN Status
arn:aws:iam::abcd1234:root Active
=== Connections
Endpoint ID Owner ARN Status
vpce-55555555 arn:aws:iam::abcd1234:root AvailableThe service name would be com.amazonaws.vpce.us-east-2.vpce-svc-123456.
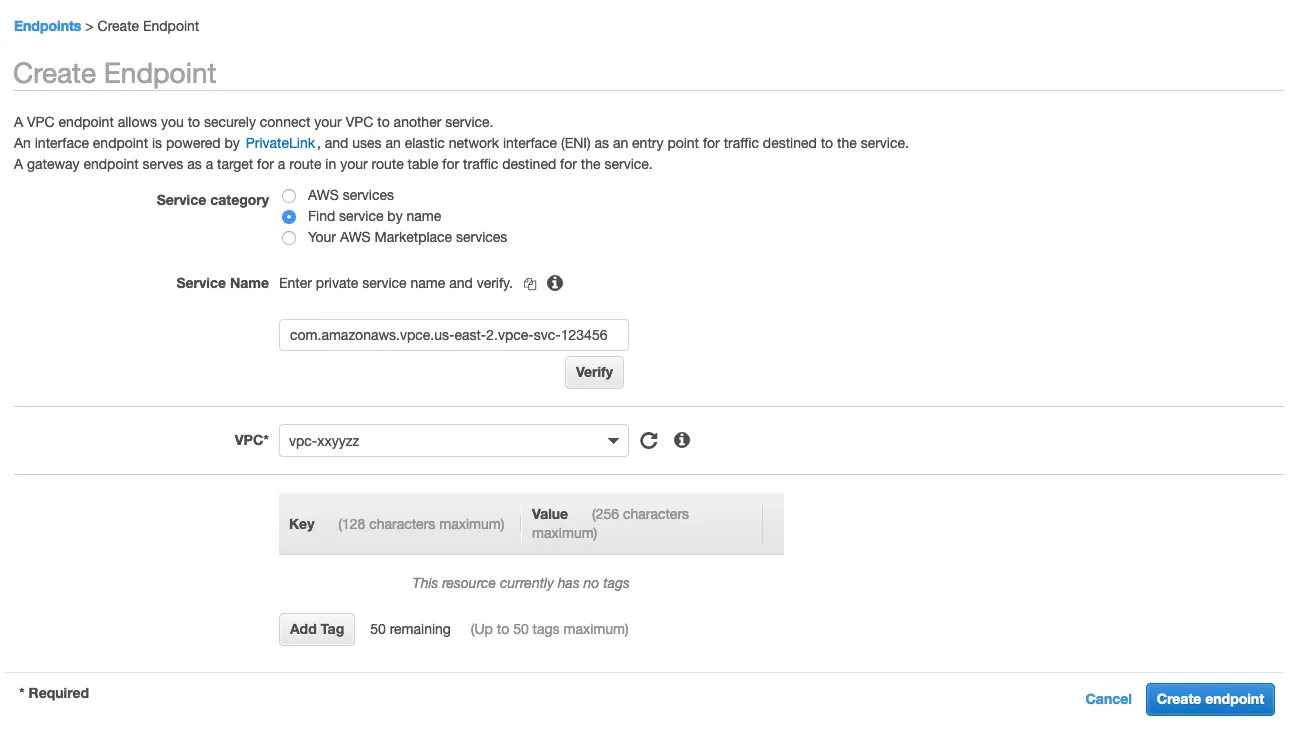
#4. Create VPC endpoint on the AWS management console.
Navigate to the VPC console, and create a new endpoint, like so:
#5. Launch an EC2 instance for proxying.
Navigate to the EC2 console, and launch an appropriately sized instance. Any OS is fine, as long as it can serve the purposes of proxying TCP traffic. I will use Ubuntu 18.04 with HAProxy in this example.
Instantiate one, making sure that it is connected to the same VPC as above.
Skip creating the security group for now — we will do that right next.
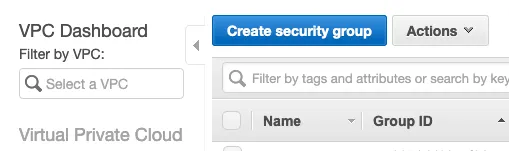
#6. Create security groups.
We need two security groups, one for the VPC endpoint, and one for the EC2 instance.
The one for the VPC endpoint just needs to allow inbound access from the EC2 instance, so create one that allows TCP access on ports 5432 from the private IP of the EC2 instance (which you can grab from the Description pane in the EC2 console).

The one for the EC2 instance needs to allow inbound access from the external parties you’re giving access to. In my case, this is Looker, whose IP addresses you can find here.
You will also need to give yourself SSH access and (optionally) TCP access on port 5432 as well, for Step 8.
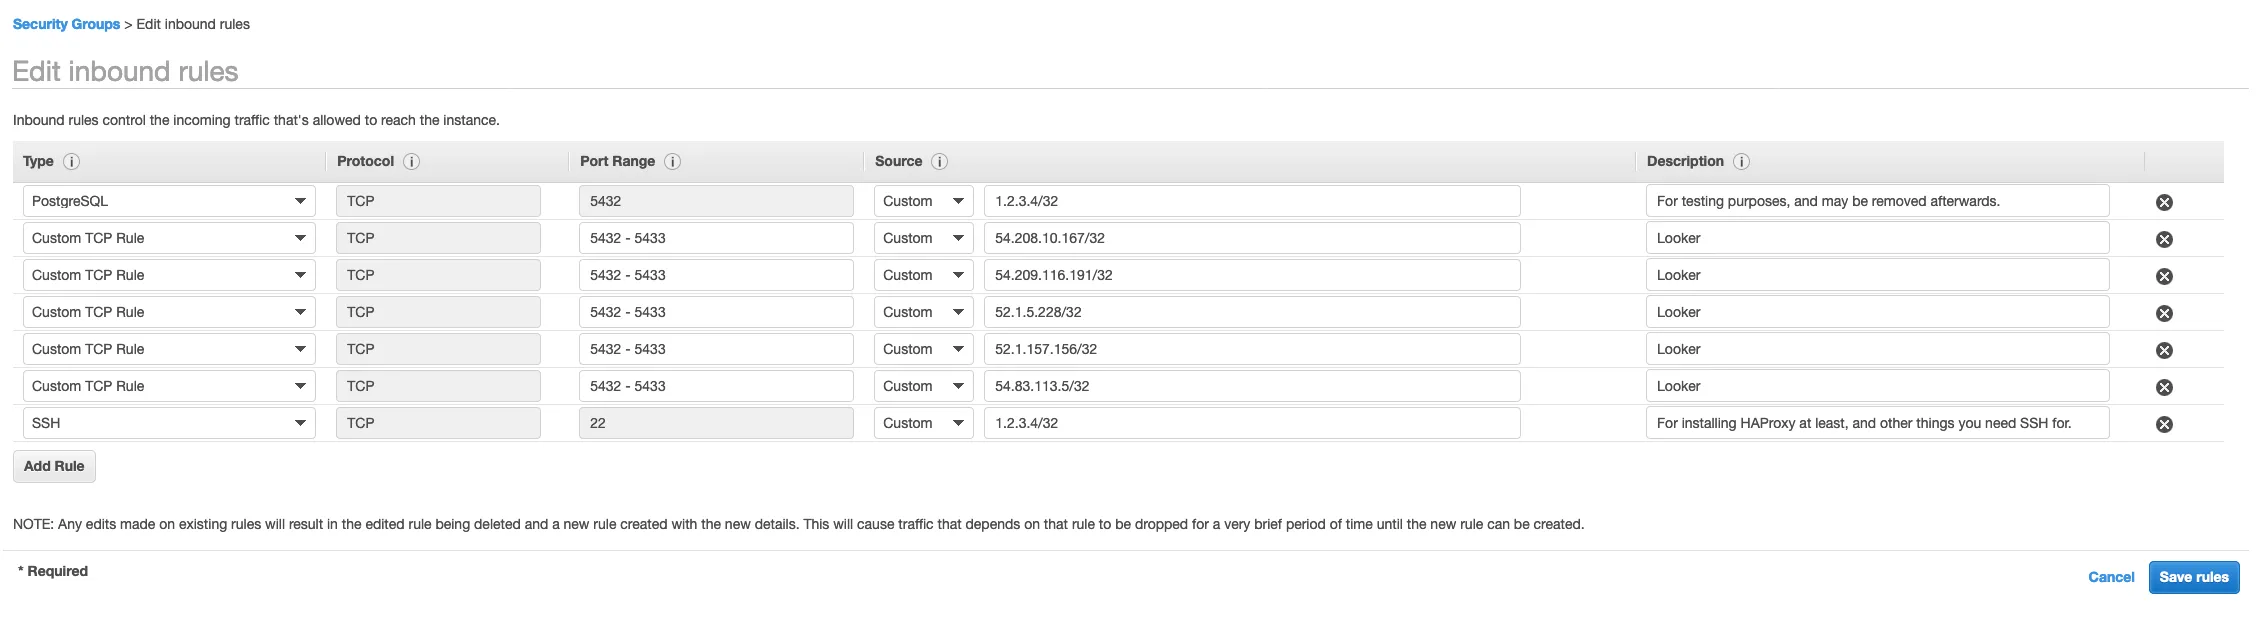
Attach them to the VPC endpoint and EC2 instance respectively.
#7. Install HAProxy on the EC2 instance.
This is fairly straightforward, so I won’t cover it here.
The configuration can be as basic as something like this:
global
...snip...

defaults
...snip...
        mode    tcp
        option  tcplog
...snip...

frontend fr1
        bind 0.0.0.0:5432
        default_backend bk1

backend bk1
        server srv1 <vpc endpoint>:5432
You can find the address of the VPC endpoint by:
heroku config --app heroku-appand grepping for the DATABASE_ENDPOINT_<ENDPOINTID>_URL entry. It will be in
the form of a standard Postgres connection string
postgres://user:password@host:5432/database. The host part of it will be
what goes into the HAProxy config.
#8. Verify that everything works.
To verify that everything works, take the connection string in Step 7, replace
the host part of the connection string with the public IP of the EC2 instance,
and attempt to connect to the Postgres database from your local machine:
psql postgres://user:password@<public ip of ec2>:5432/databaseIf you see a psql prompt, it works!
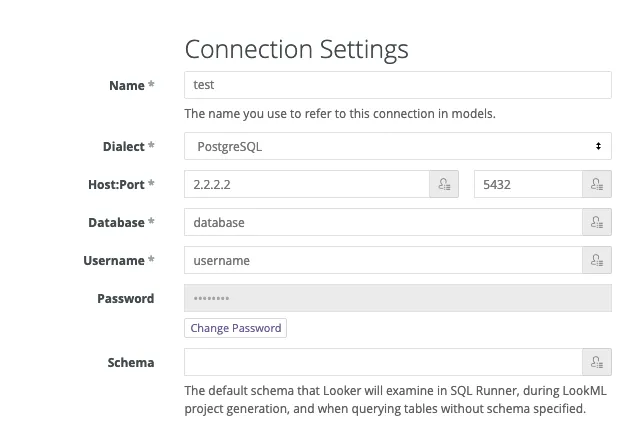
#9. Enter connection credentials into Looker.
Once step 8 is done, you may remove access to port 5432 from your local machine. Then input the connection credentials (the same ones in Step 8) into Looker:
The last few steps is adaptable for any external party that needs access to the Postgres database. Just make sure that you adjust your security groups appropriately - after all, that’s why the Postgres database is in a Private space in the first place, right?